How to install Android L on Nexus devices

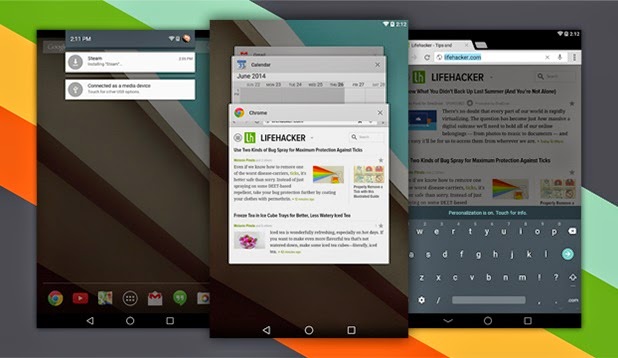
Google simply dropped its first developer preview of the next coming Android version Android L Lollipop. For those who are anxious to get your phones with Android L the latest and greatest, here’s the way to install Android L on your Nexus 5, Nexus 4, Nexus 10, Nexus 7 LTE (2013), Nexus 7 WiFi (2013), Nexus 7 LTE (2012) and Nexus 7 WiFi (2012) at this moment.

How to install Android L on Nexus

How to install Android L developer preview on your Nexus

In start with, you may have to unlock your device, ADB and fastboot installed. Then follow these guidelines:

  1. Download the Google preview image for your nexus device here of from the above link.
  2. Unzip the files and locate it in desktop folder.
  3. Enable debug mode and connect your to your computer by a USB cable.
  4. Open a command line for ADB.
  5. Enter adb reboot bootloader to access your device’s bootloader.
  6. Navigate to the folder containing Google Android L image.
  7. Enter flash-all to run the script to install Android L on your Nexus device.

The script will take a moment to run and your device may repeat the boot animation for a while (in my tests, it took about five minutes for my device to boot). Once the gadget boots, log in and you’re prepared to go!

Caution: It’s specified on Google’s download pages, that flashing this will erase your device and all your data. Backup your device and store safely on your compute before starting.

How to send Canned Responses in Gmail

You may be tired of sending same email message everyday as a responding email or a reporting email. Every time you cannot type or copy and paste from notepad file. Gmail has a solution to send similar emails responses to many people. Google labs has a feature called Canned Responses. This feature allows you to save the emails as Canned Response, you can send same email to many people without copy and paste the email multiple times. You can save many canned responses under different title names.

Send Canned Responses in Gmail

How to send same response email multiple times

Login to your Gmail account.

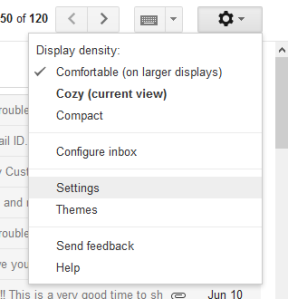
Click on settings icon from top right corner and select Settings from the drop down menu.

gmail settings

Go to the Labs tab.

gmail labs

Scroll down and locate Canned Responses. Select Enable radio button and click on Save Changes button at the top or bottom. If you didn’t identify Canned Responses search canned responses at search for a lab.

enable gmail canned response

Now your Browser will reload your Gmail.

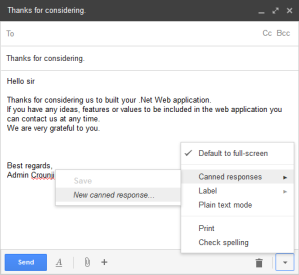
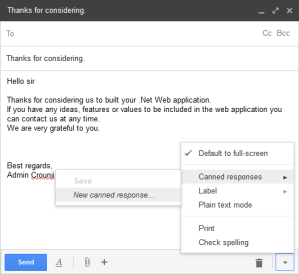
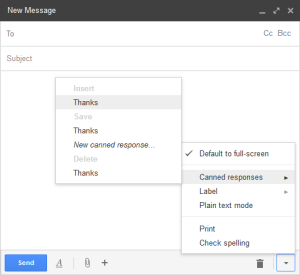
Compose email which you will use multiple times. You can save this email as response mail. Click on drop down icon near trash icon on composing email popup. Select Canned responses and New canned response…

Save gmail canned response

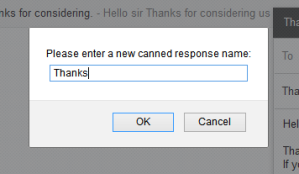
A popup window appears asking you to name the response message to save. Type the response name and click OK

gmail canned response name

When you like to send multiple response or reply emails. Click on the dropdown icon near the trash button on composing popup and select Canned response and choose the saved response email. The saved email will appear on the compose window.

calling saved gmail canned response

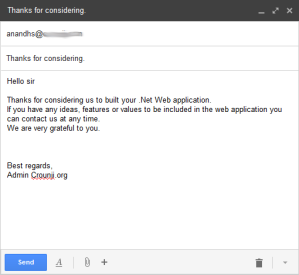
Now you may have to do some editing works like changing names, dates and email address. Now you can send the email.

send gmail canned response mail

This method reduces time and makes every emails personalized.

Valga valamudan

How to send scheduled Gmail email

What we do to send a email. save the email in draft, remembering to send the email on time. But getting online at that time may be a problem. So email scheduling is a attractive feature. Sending emails in timely manner is a good practice. Usually receiver will appreciate it better when email receiving on time. Sending emails too early and late will not get reputation.

send scheduled Gmail email

Instead of drafting the content and saving in draft folder. And forgetting it due to busy schedule. Now let the draft folder send email for you on a pre set time. Scheduling email is a great feature. It helps a lot in many occasions.

Schedule Gmail emails using Rightinbox

Rightinbox is a browser extension available in Mozilla Firefox, Chrome and Safari browser on all platforms. Rightinbox integrates with Gmail and gives you ‘Send Later’ button near normal send button on composing and reply.

Install Rightinbox browser extension

Visit Rightinbox website. Click on ‘Install now‘ button.

send scheduled gmail

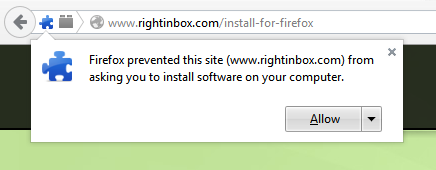
Browser will ask permission to install the browser extension just hit on ‘Allow‘ button. (Here Firefox browser is used)

send scheduled email

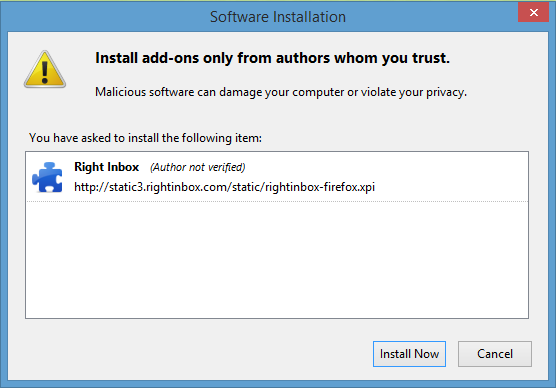
Now a popup will appear click ‘Install Now‘.

rightinbox install

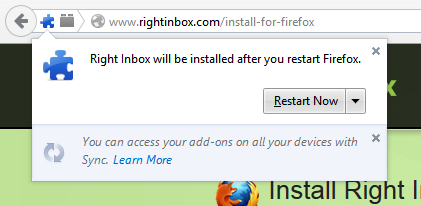
Now Click on ‘Restart Now‘ button on a message popup.

rightinbox install

Now Rightinbox browser extension is installed.

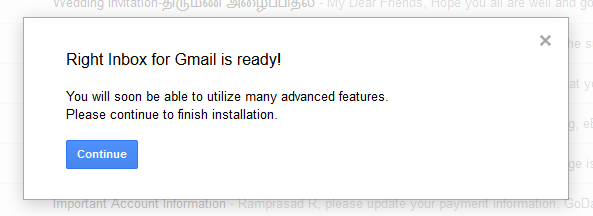
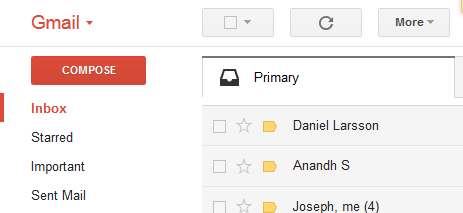
Now sign in to gmail account. you will get a notification. “Right Inbox for Gmail is ready!” Click on ‘Continue‘ button.

send scheduled gemail

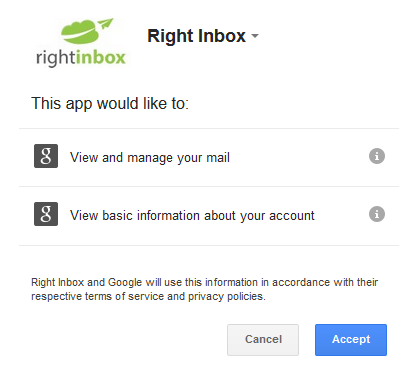
Finally Rightinbox asks permission to access your Gmail basic information and manage your email to include ‘Send Later’ button. Hit ‘Accept

rightinbox permission

On a “Right Inbox is ready!” popup view the video for additional information. and click ‘Close‘.

Another popup appears “Right Inbox Pricing” select limited. press the ‘Select button‘.

If you like to share Right inbox on social media share or otherwise close the popup.

Installation of RightInbox is completed.

How to send scheduled email on Gmail

To schedule a email, Compose a email.

send scheduled email

Now you will see a ‘Send Now’ and ‘Send Later’ button. Click on ‘Send Later‘ button to schedule your email.

send scheduled email

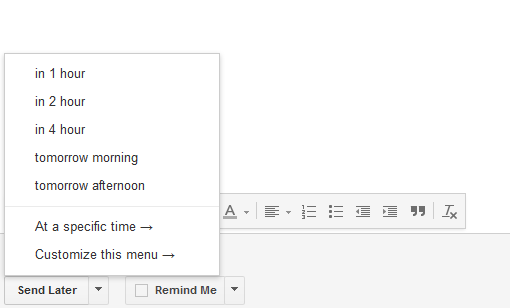
On ‘Send Later‘ You can find options to send the email at preferred time. You can choose in 1, 2, 4, tomorrow morning, tomorrow afternoon or at a specific time. If preset timings didn’t match tour time click on ‘at a specific time’.

schedule your Gmail

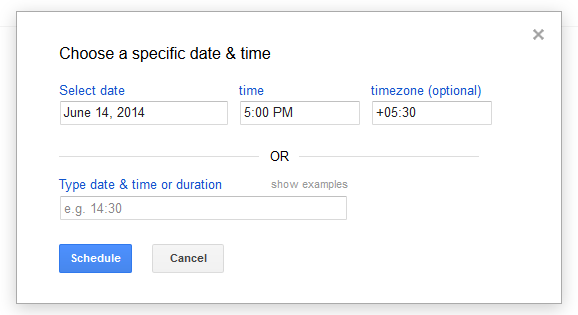
On ‘at a specific time’, you can choose your preferred date, time and time zone to send your email.
When the time is set, click on ‘Schedule‘ button to send your scheduled email.

schedule your Gmail

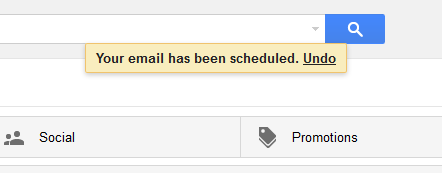
Now your email is scheduled to your specified time.

schedule Gmail

Note: Scheduled email will be saves as draft mail. When the time arrives email will be sent automatically and moves to ‘sent’ folder.
This is not a official Gmail Feature. But Rightinbox browser extension will help you to send emails and reminders on time.

Valga valamudan
How to submit Blogger sitemap to Google Webmaster

What is Sitemap?

Sitemap is your site / blog’s map. It contains your whole blog / site posts and pages for better and easier navigation. Also submitted to search engines to index your entire blog in search engines.

XML Sitemap is a XML file which is like a directory of all your web pages published on your website or blog. Search engines like Google, Bing, Yahoo, Yandex and Baidu can use these sitemap file to identify and index your web pages. Search bots will crawl your web pages regularly using sitemap. This helps search engines to show relevant results during search.

submit sitemap to Google Webmaster

Why to Submit Blogger Sitemap in Google webmaster?

Submitting your site’s sitemap to Google webmaster is a application request to Google search giant to index your entire blog. After submitting your sitemap Google search will index your site.

When someone search a relevant keyword to your post in Google search, Your blog post will appear in search results. It will increase your site traffic.

Hope you figured out the reason.

How to submit Blogger sitemap to Google Webmaster

1. Signin to Google Webmaster tool using your Gmail email id and password.

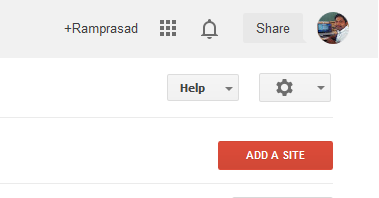
2. Click on ADD A SITE red color button on right side top.

 Google Webmaster add a site

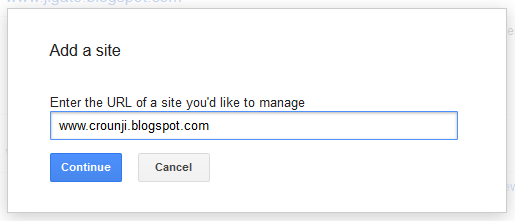
3. Enter your website / blog address.

submit sitemap to Google

4. Now Google Webmaster will verify your blog automatically by blogger. If you use custom domain in blogger. Webmaster will automatically verify using CNAME record. If webmaster doesn’t verified automatically, verify using html meta tags.

5. On the Site Dashboard in left side click crawl on the drop down menu select sitemap.

submit Blogger sitemap to Google Webmaster tool

6. Click on ADD/TEST SITEMAP.

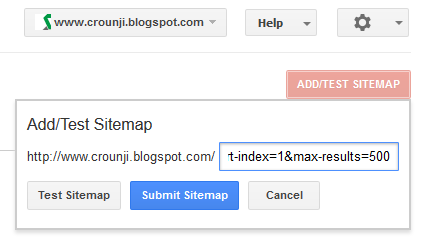
7. Add/Test Sitemap popup appears

submitting Blogger sitemap to Google Webmaster

8. Copy and paste below code in the text box and hit Submit Sitemap button.

atom.xml?redirect=false&start-index=1&max-results=500

The above code is for 1 to 500 posts only.if you have more than 500 posts published, replace 1 with 501,1001,1501 and soon.

example
atom.xml?redirect=false&start-index=1&max-results=500
atom.xml?redirect=false&start-index=501&max-results=500
atom.xml?redirect=false&start-index=1001&max-results=500
atom.xml?redirect=false&start-index=1501&max-results=500
atom.xml?redirect=false&start-index=2001&max-results=500
atom.xml?redirect=false&start-index=2501&max-results=500
atom.xml?redirect=false&start-index=3001&max-results=500

Congrats ! You have successfully submitted your blog sitemap to Google. Now you have to wait for couple of days for indexation.

Valga valamudan
How to Send and Archive Gmail Email in one click

In Gmail one of the great feature is threaded conversation. It helps in reducing confusion, particularly for busy people who does business and official conversation through email. Archiving daily is a hard part for many people, and one of best way is keeping inbox clean without confusion this can be done by art of archiving.

send archive gmail

Google’s Gmail made a easy way to archive the emails by its “Archive” button, It becomes hard if you try to do archive weekly or monthly. But do you know that you can archive emails when you click on send button. This feature helps you in organizing your email inbox in long run without spring clean your email inbox.

Also read: How to send encrypted emails with SecureGmail

How to Send and archive emails Simultaneously in Gmail

Send & archive button is disabled by default. To enable Send and Archive button in composing email popup window.

Login to your Gmail email account.

Click on top right corner button (gear button), on the drop down menu select settings.

gmail archive settings

Scroll down the settings page and find ‘Send and Archive’. Select ‘Show “Send & Archive” button in reply’ radio button.

gmail archive show button

Now scroll down and hit Save changes button to save the settings.

gmail archive save button

Now your Gmail will show ‘Send & Archive’ button and ‘Send’ button when you compose a new email or when reply to a email. To archive a conversation you can click in Send + archive & button when you reply or send a new email. You can also click on send button for other email you wish not to archive.

gmail send and archive

If you accidentally archived a wrong email thread, you can click on Undo link which appear near the top of your inbox after sending the email.

Alternatively, you can also move the conversation back to inbox. Go to Sent Messages – Select the conversation you want and click on Move to Inbox button at the top.

In case you won’t receive future emails from archived conversation, don’t worry. Archiving your email conversation will not affect future in coming emails to archived conversation. New email conversation messages will still appear in your inbox.

Valga valamudan